
[JavaScript] 자바스크립트로 동적 테이블 만들기 (ft. 버튼 클릭)

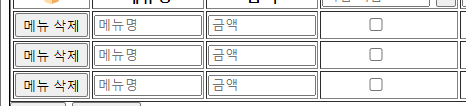
구현하려고 하는 동적 테이블
리액트 주차를 시작하기 전에 바닐라 자바스크립트로 간단한 1/N 계산기를 만들어보고 싶었다. 사용자가 데이터를 편하게 입력할 수 있도록 행은 메뉴를, 열은 인원을 동적으로 입력할 수 있도록 table로 만들었다.
HTML 구성
<main>
  <section id="calculator">
    <div id="calculator_addBtn">
      <button id="add_menu">메뉴추가</button>
      <button id="add_person">인원추가</button>
    </div>

    <div>
      <form>
        <table id="calculator_table" border="1">
          <thead>
            <tr>
              <th>🍞</th>
              <th>메뉴명</th>
              <th>금액</th>
              <th>
                <input type="text" name="person" placeholder="사람 이름">
                <button class="td_delete" onclick="td_delete_event(this)">-</button>
              </th>
              <th>
                <input type="text" name="person" placeholder="사람 이름">
                <button class="td_delete" onclick="td_delete_event(this)">-</button>
              </th>
            </tr>
          </thead>
          <tbody>
            <tr>
              <td><button class="tr_delete" onclick="tr_delete_event(this)">메뉴 삭제</button></td>
              <td><input type="text" name="menu" placeholder="메뉴명"></td>
              <td><input type="text" name="price" placeholder="금액"></td>
              <td><input type="checkbox" name="check"></td>
              <td><input type="checkbox" name="check"></td>
            </tr>
          </tbody>
        </table>
      </form>
    </div>
  </section>
</main>

<!-- javaScript -->
<script src="./js/menu.js"></script>
</body>
식사비용 1/N 계산의 경우 메뉴 한 개, 사람 두 명 이상은 필수값이므로 HTML에 하드코딩했다. 두 번째 메뉴, 세 번째 사람부터는 버튼을 클릭해 동적으로 추가 및 삭제가 가능하도록 HTML을 구성했다.
버튼 클릭 시 행 추가하기
전체 코드
document.getElementById('add_menu').addEventListener('click', () => {
    // table 변수는 다른 함수에서도 사용되므로 실제 코드에서는 최상단에 선언해 사용했다.
    const table = document.getElementById('calculator_table');
    const new_row = table.insertRow();
    const cell_length = table.rows[1].cells.length;

    for(let i = 0; i < cell_length; i++) {
        const new_cell = new_row.insertCell(i);
        let temp_html = ``;
        if(i === 0) {
                temp_html = `<td><button class="tr_delete" onclick="tr_delete_event(this)">메뉴 삭제</button></td>`;
        } else if(i === 1) {
                 temp_html = `<td><input type="text" name="menu" placeholder="메뉴명"></td>`;
        } else if(i === 2) {
                 temp_html = `<td><input type="text" name="price" placeholder="금액"></td>`;
        } else {
                temp_html = `<td><input type="checkbox" name="check"></td>`;
        };
        new_cell.insertAdjacentHTML('afterbegin', temp_html);
    }
});
코드 해석
const new_row = table.insertRow();
열 추가는 insertRow를 사용하게 간편하게 추가할 수 있다.
insertRow([index])
- <table>에 새로운 <tr>을 직접 삽입한다.
- index는 선택 값으로, 새로운 행의 인덱스를 지정한다. 기본값은 -1로 마지막 행을 추가하며 index에 기재된 값이 있으면 해당 인덱스에 row를 insert한다.
const cell_length = table.rows[1].cells.length;
열 또한 동적으로 추가되므로 현재의 열 개수를 구한다. row[0]은 thead이고 아래는 모두 tbody이므로 rows[1]로 길이를 구한다.
  for(let i = 0; i < cell_length; i++) {
    const new_cell = new_row.insertCell(i);
  }
insertRow를 이용해 행을 넣고, 각 tr마다 td가 존재하므로 insertCell을 이용해 열을 같이 넣어준다.
insertCell([index])
- <table>에 새로운 <td>를 직접 삽입한다.
- index는 선택 값으로, 새로운 열의 인덱스를 지정한다. 기본값은 -1로 마지막 열을 추가하며 index에 기재된 값이 있으면 해당 인덱스에 cell을 insert한다.
let temp_html = ``;
if(i === 0) {
        temp_html = `<td><button class="tr_delete" onclick="tr_delete_event(this)">메뉴 삭제</button></td>`;
} else if(i === 1) {
         temp_html = `<td><input type="text" name="menu" placeholder="메뉴명"></td>`;
} else if(i === 2) {
         temp_html = `<td><input type="text" name="price" placeholder="금액"></td>`;
} else {
        temp_html = `<td><input type="checkbox" name="check"></td>`;
};
첫 번째 열(i === 0)은 삭제 버튼, 두 번째(i === 1), 세 번째 열(i === 2)은 각각 메뉴명과 금액을 입력할 수 있는 input, 세 번째 이후의 열(i ≥ 3)은 모두 동일한 체크박스로 이므로 if-else를 사용해 temp_html을 다르게 지정한다.
new_cell.insertAdjacentHTML('afterbegin', temp_html);
지정한 temp_html을 새로운 셀에 붙여준다. innerHTML이 아니라 insertAdjacentHTML을 사용한 이유는 innerHTML의 경우 노드를 재구성하는 과정에서 실행 시간이 많이 낭비되어 성능이 상대적으로 떨어지기 때문이다. (MDN에서도 innerHTML보다 insertAdjacentHTML 사용을 더 권장하고 있다.) 따라서 상대적인 위치를 지정해 노드를 추가하는 방식인 insertAdjacentHTML을 사용했다.
버튼 클릭 시 열 추가하기
전체 코드
document.getElementById('add_person').addEventListener('click', () => {
    // table 변수는 다른 함수에서도 사용되므로 실제 코드에서는 최상단에 선언해 사용했다.
    const table = document.getElementById('calculator_table');
    for (let i = 0; i < table.rows.length; i++) {
        if(i === 0) {
          const header_row = table.querySelector('thead tr');
          const new_th = document.createElement('th');
          const temp_html = `<input type="text" name="person" placeholder="사람 이름">
                             <button class="td_delete" onclick="td_delete_event(this)">-</button>`;
          new_th.insertAdjacentHTML('beforeend', temp_html);
          header_row.appendChild(new_th);
        } else {
          const newCell = table.rows[i].insertCell(-1);
          newCell.insertAdjacentHTML('beforeend', `<td><input type="checkbox" name="check"></td>`);
        }
    }
});
코드 해석
for (let i = 0; i < table.rows.length; i++) {
	...
}
각 행마다 모두 열을 추가해야 하므로 table.rows.length만큼 반복한다.
if(i === 0) {
  const header_row = table.querySelector('thead tr');
  const new_th = document.createElement('th');
  const temp_html = `<input type="text" name="person" placeholder="사람 이름">
                     <button class="td_delete" onclick="td_delete_event(this)">-</button>`;
  new_th.insertAdjacentHTML('beforeend', temp_html);
  header_row.appendChild(new_th);
} else {
  const newCell = table.rows[i].insertCell(-1);
  newCell.insertAdjacentHTML('beforeend', `<td><input type="checkbox" name="check"></td>`);
}
i(행의 길이)가 0일 경우 thead 행이므로 i가 0일 때만 다르게 설정해 주었다. thead 부분은 createElement('th')를 이용해 별도로 th를 만들고 insertAdjacentHTML을 이용해 붙여주었다. thead가 아닌 tbody 부분부터는 이전과 같이 insertCell을 이용해 td를 붙여주었다. (thead에서 createElement를 사용한 이유는 트러블슈팅에 기재해 두었다.)
버튼 클릭 시 행 삭제하기
<td>
	<button class="tr_delete" onclick="tr_delete_event(this)">메뉴 삭제</button>
</td>
행 삭제 버튼의 HTML은 위와 같이 작성되어 있다. 버튼을 onclick할 때 삭제 이벤트를 부르며 this를 같이 넘겨준다. 태그 내에서의 this는 태그 자기 자신을 가리킨다.
<tr>
    <td><button class="tr_delete" onclick="tr_delete_event(this)">메뉴 삭제</button></td>
    <td><input type="text" name="menu" placeholder="메뉴명"></td>
    <td><input type="text" name="price" placeholder="금액"></td>
    <td><input type="checkbox" name="check"></td>
    <td><input type="checkbox" name="check"></td>
</tr>
HTML을 보면 하나의 tr은 위와 같이 이루어져 있다. 이때 tr 안의 첫 번째 td 내부의 button에서 this를 하면 button이 지정되어 자바스크립트로 데이터가 넘어간다.
const tr_delete_event = (btn) => {
  const row_index = btn.closest('tr').rowIndex;
  if(row_index === 1) {
    alert(`첫 번째 행은 삭제할 수 없습니다.`);
    return;
  }
  table.deleteRow(row_index);
};
this로 받아온 클릭된 button을 btn이라고 지정해 두고, btn에서 가장 가까운(closest) tr을 찾아 해당 tr의 rowIndex를 찾는다. 클릭된 btn에서 가장 가까운 tr은 해당 버튼을 품고 있는 tr이므로 클릭된 버튼이 있는 행의 인덱스를 반환한다.
Element.closest(selectors)
주어진 CSS Selectors와 일치하는 요소를 찾을 때까지 자기 자신을 포함해 위쪽 (부모 방향, 문서 루트까지) 으로 문서 트리를 순회한다. selectors에 일치하는 가장 가까운 조상 element 또는 자기 자신을 반환하고, 일치하는 요소가 없으면 null을 반환한다.
그 후 인덱스가 1이라면 첫 번째 행은 삭제하지 못하게 하고 (첫 번째 행, 첫 번째, 두 번째 열은 필수값으로 지정했다.) 1이 아니라면 deleteRow를 이용해 해당하는 행을 지워준다.
버튼 클릭 시 열 삭제하기
<th>
    <input type="text" id="person2" name="person" placeholder="사람 이름">
    <button class="td_delete" onclick="td_delete_event(this)">-</button>
</th>
열 삭제의 HTML은 위와 같이 이루어져 있다.
const td_delete_event = (td) => {
  const col_index = td.closest('th').cellIndex;
  if(col_index < 5) {
    alert(`첫 번째, 두 번째 열은 삭제할 수 없습니다.`);
    return;
  }
  for(let i = 0; i < table.rows.length; i++) table.rows[i].deleteCell(col_index);
}
열 또한 클릭한 요소에서 가장 가까운 th를 찾아 해당 tr의 colIndex를 찾고, 해당 인덱스의 열을 삭제한다.
트러블 슈팅
의도와 다른 행/열추가
오류 발생 코드
// 행 추가
document.querySelector('#addMenu').addEventListener('click', () => {
  const temp_menu = `
    <tr>
      <td><input type="text" name="" placeholder="메뉴명"></td>
      <td><input type="text" name="" placeholder="금액"></td>
      <td>
        <input type="checkbox" name="" id="">
      </td>
      <td>
        <input type="checkbox" name="" id="">
      </td>
      <td class="td_delete">
        <button>메뉴 삭제</button>
      </td>
    </tr>
  `;
  document.querySelector('tbody').insertAdjacentHTML('beforeend', temp_menu);
});

// 열 추가
document.querySelector('#addPerson').addEventListener('click', () => {
  const temp_person_th = `
    <th>
      <input type="text" name="" placeholder="사람 이름">
      <button>-</button>
    </th>
  `;
  const temp_person_td = `
    <td>
      <input type="checkbox" name="" id="">
    </td>
  `;
  document.querySelector('.th_delete').insertAdjacentHTML('beforebegin', temp_person_th);
  document.querySelector('.td_delete').insertAdjacentHTML('beforebegin', temp_person_td);
});
맨 처음 동적인 테이블을 만들기 위해 위와 같이 코드를 작성했는데, 의도와 다르게 행 추가, 열 추가가 이루어졌다.
오류 해결 방법
자바스크립트 테이블 열 추가 키워드로 검색해 보니 테이블에 행을 추가할 수 있는 별도의 함수가 있었다. 바로 insertRow와 insertCell! 해당 메서드를 적용하여 테이블을 생성하도록 수정했다.
동적으로 생성된 행은 이벤트가 걸리지 않는 문제
오류 코드 및 내역
document.getElementsByClassName('tr_delete').addEventListener('click', () => {
  console.log(event)
})
위와 같이 class에 addEventListener를 걸었는데 의도와 다르게 이벤트가 걸리지 않고 아래와 같은 에러가 출력되었다.
Uncaught TypeError: document.getElementsByClassName(...).addEventListener is not a function
오류 해결 방법
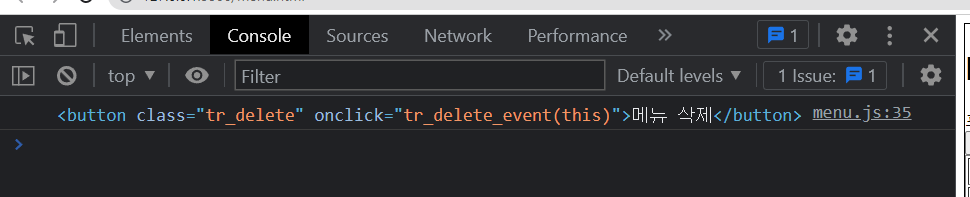
// html
<td><button class="tr_delete" onclick="tr_delete_event(this)">메뉴 삭제</button></td>

// javascript
const tr_delete_event = (tr) => {
  console.log(tr)
};
HTML 요소 자체에 onclick을 넣고, onclick에서 this로 자바스크립트에 값을 보낸다. HTML 태그 내에서의 this는 태그 자기 자신을 가리킨다고 한다. 처음엔 this라는 키워드만 보고 JS의 this인가? 싶었는데 HTML도 this를 가지고 있다!
선택한 열을 삭제하지 못하는 문제
오류 내역 및 경로
const col_index = td.closest('th');   // th값 자체를 가져오지 못하고 있음
console.dir(col_index);
deleteCell을 할 때 해당 열의 index를 넘겨줘야 해서 this의 closest로 th를 선택해서 가져오려 했으나, 계속 해당 값을 가져오지 못했다.
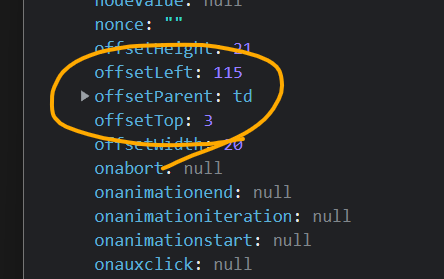
이유를 모르겠어서 console.dir로 찍어보니 offsetParent(첫 번째로 매칭되는 부모 요소)가 td로 되어있는 것을 확인할 수 있었다. th가 아니고 왜 td인지 이 또한 알 수 없었다.
이것저것 찍어보니 HTML에 하드코딩된 th는 값을 가져오지만 동적으로 추가한 요소들은 값을 가져오지 못한다는 것을 확인할 수 있었다.
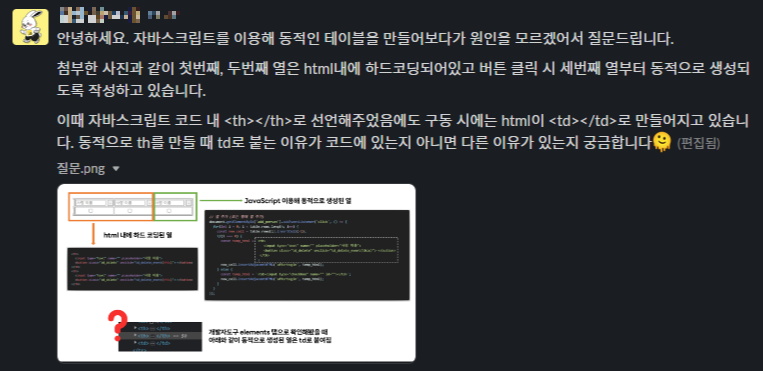

뭔가 안된다 → 값이 안 찍힌다 → 상황에 따라 바라보는 부모 요소가 다르다 → 나는 분명 th로 넣어줬는데 HTML에는 td로 들어가고 있다에 도달하기까지 정말 코드를 한 줄 한 줄 뜯고 콘솔을 찍어보며 두 시간 넘게 걸린 것 같다. 이유를 모르겠어서 질문을 올렸는데.. 머쓱하게도 질문을 올린 뒤에 바로 답을 찾았다.
오류 원인

insertCell 메서드는 새로운 셀 추가 시 <td>만 반환하기 때문에 <th> 요소 사용은 불가하다고 하기 때문이었다! 세상에 이런 이유라니.. 그렇기 때문에 하드코딩한 데이터와 아닌 것의 cloest가 달랐던 것이다.
오류 해결 방법
이제 선택을 해야 했다. 문제는 insertCell을 사용하기 때문에 thead 내부에 th가 아닌 td가 붙고 있었기 때문이었으니 insertCell을 사용해서 td로 열을 붙이거나, insertCell이 아닌 다른 방법으로 th를 붙여줘야 했다.
- insertCell을 사용하면 insertAdjacentHTML로 직접 붙이는 것보다 간결하고 편하게 코드를 작성할 수 있다.
- 하지만 insertCell은 th를 넣지 못하므로 thead 부분에 th가 아니라 td를 사용해야 한다.
- 하지만 thead 아래는 th 요소를 사용하는 게 시맨틱 하고 의미 있는 마크업이다.
이에 대해 불편하더라도 insertAdjacentHTML로 붙여주느냐, 약간의 시맨틱을 포기하고 thead를 일반 tbody로 바꿔버리며 insertCell을 쓰느냐에 대해 깊이 고민했다. 하지만 시맨틱 한 마크업이 더 중요하다고 생각하기 때문에 insertAdjacentHTML을 사용해 오류를 해결했다.
시맨틱한 마크업이 더 중요하다고 생각한 이유는
- 첫째, 모든 웹 사용자가 동일한 환경에서 웹에 접근하지 않는다. 스크린 리더 사용자도 있을 것이고 다양한 환경을 고려하며 개발을 하고 싶다.
- 둘째, 검색 엔진 로봇이 해당 페이지를 읽을 때도 시맨틱 마크업이 중요하기 때문이다. 결국 프론트엔드 개발자가 될 것이고 추후 SEO까지 고려한다면 처음부터 시맨틱 하게 작성해야 하는 것을 손에 익혀둬야 한다고 생각했다.
사소한 원인으로 깊은 부분까지 고민해보게 하는 어려운 오류였다.
[참고 자료]
https://developer.mozilla.org/en-US/docs/Web/API/HTMLTableElement/insertRow
HTMLTableElement: insertRow() method - Web APIs | MDN
The HTMLTableElement.insertRow() method inserts a new row (<tr>) in a given <table>, and returns a reference to the new row.
developer.mozilla.org
https://developer.mozilla.org/ko/docs/Web/API/Node/appendChild
Node.appendChild() - Web API | MDN
Node.appendChild() 메소드는 한 노드를 특정 부모 노드의 자식 노드 리스트 중 마지막 자식으로 붙입니다. 만약 주어진 노드가 이미 문서에 존재하는 노드를 참조하고 있다면 appendChild() 메소드는 노
developer.mozilla.org
https://developer.mozilla.org/ko/docs/Web/API/Element/closest
Element.closest() - Web API | MDN
Element의 closest() 메서드는 주어진 CSS 선택자와 일치하는 요소를 찾을 때까지, 자기 자신을 포함해 위쪽(부모 방향, 문서 루트까지)으로 문서 트리를 순회합니다.
developer.mozilla.org
https://hianna.tistory.com/443
[Javascript] 테이블에 행 추가, 삭제하기 (버튼 클릭)
이번에는 버튼을 클릭하여 테이블에 행을 추가하고 삭제하는 방법을 알아보도록 하겠습니다. 1. 테이블에 행 추가하기 - insertRow(), insertCell() 2. 테이블에 행 삭제하기 - deleteRow() 1. 테이블에 행 추
hianna.tistory.com
https://hianna.tistory.com/473
[Javascript] 테이블에 열(column) 추가, 삭제하기
지난 번에는 테이블에 행(row)를 추가/삭제하는 방법을 알아보았습니다. 이번에는, 테이블에 열을 추가하고, 삭제하는 방법을 알아보도록 하겠습니다. 열(column) 추가하기 사과apple 오렌지orange 바
hianna.tistory.com
https://wonism.github.io/innerhtml-insertadjacenthtml/
WONISM's Blog
WONISM's Blog
wonism.github.io
https://okky.kr/questions/804433
OKKY - onclick(this) 값넘어가는거 질문입니다
onclick(this) 로 input태그에서 값넘길떄name="a" value="1" 일경우 자바스크립트 함수에서fucntion a(val){} 일경우 val값이 1이들어가나여?var a= document.getElementsName('a');도선언했을때요
okky.kr